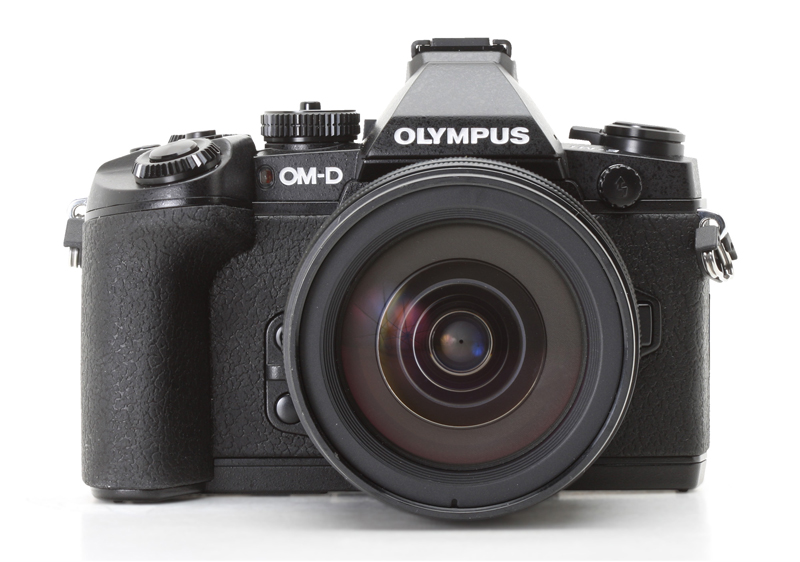
I’ve decided to supplement my Canon cameras and lenses with suitable Olympus mirrorless alternatives. I was particularly attracted to the Olympus E-M I & E-M II cameras along with their excellent pro lenses. This system has many desirable features:
- Portability – much smaller and lighter than my Canon gear. Better for my travel needs especially when visiting nature reserves.
- Build quality and camera aesthetics – full metal construction, waterproof / weather sealing, beautiful retro styling and a plethora of buttons that can be customised.
- Very good ergonomics – fits comfortably in hand, with all controls well laid out and within easy access of fingers.
- Four-Thirds-Sensor – this may be seen as a disadvantage for many but for my macro needs it’s a definite advantage. This is because the smaller sensor gives x2 magnification compared to a full frame camera. The Olympus sensor also gives greater depth of field at chosen apertures than APS or Full Frame sensors. This was my main reason for choosing Olympus.
- On board focus stacking and bracketing – Canon has only just caught up and introduced this feature on their cameras i.e. Canon 90D and M6 mark II. Olympus cameras have had this feature for many years so it is well evolved and implemented.
- Value for money – although relatively expensive, second hand Olympus cameras and lenses are cheaper than Canon equivalent gear.
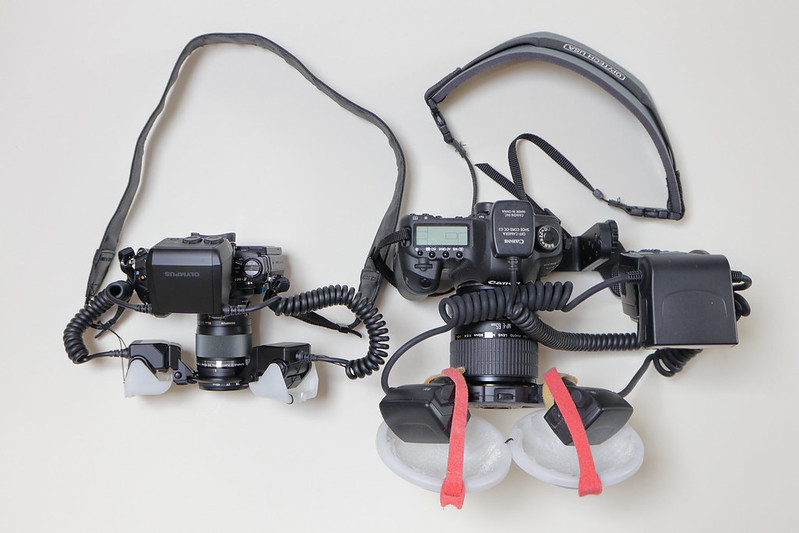
Left: Olympus E-M1 / Olympus 60mm macro / Olympus STF-8 – Total weight approx 1 kilo
Right: Canon 5D MKII / Canon MPE 65mm / Yongnuo YN24EX / Canon Speedlight bracket SB-E2 – Total weight approx 3 1/2 kilos. The Olympus set-up is more than 3 times lighter!
As can be seen, I had many compelling reasons to purchase Olympus gear. I was particularly excited and eager to try out the in-built focus stacking and bracketing feature available on my E-M1 camera. Focus stacking is a useful technique that allows you to get more depth of field in a single image without using resolution-busting small apertures. I was curious to find out how well it would compare with:
- Using a tradition focus rail – such as the Novaflex Castel Q Focus Rail.
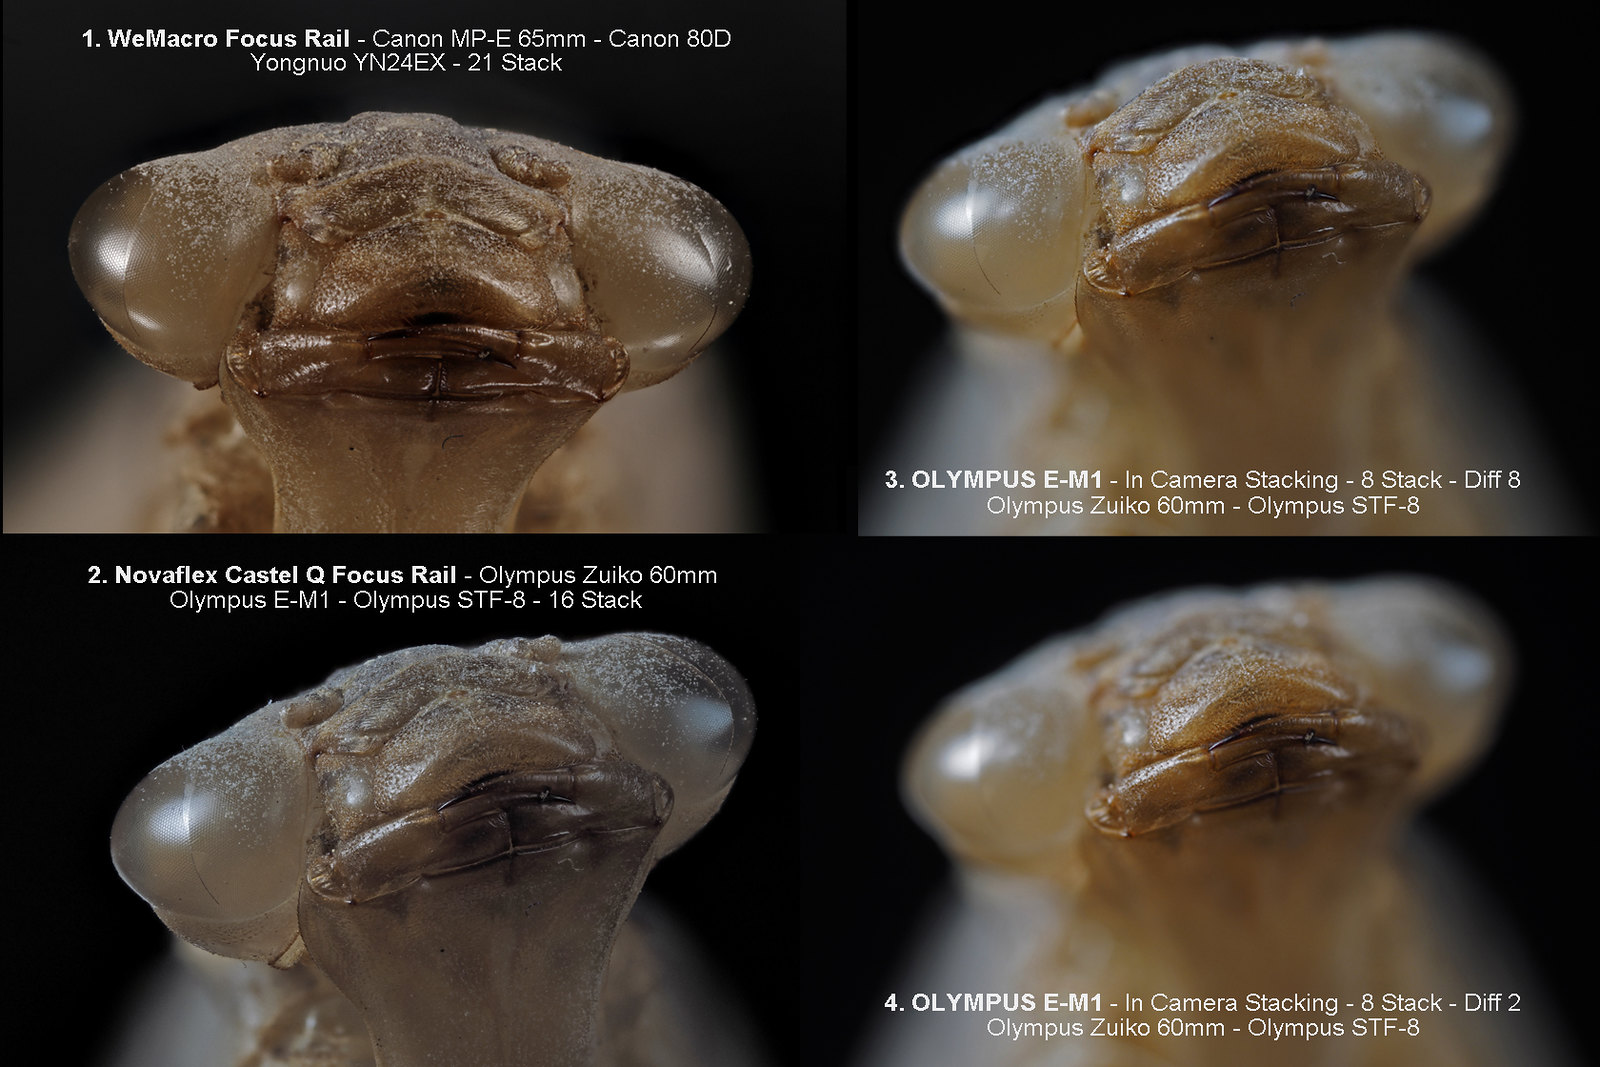
- Using an automated rail – such as The WeMacro Focus Rail.
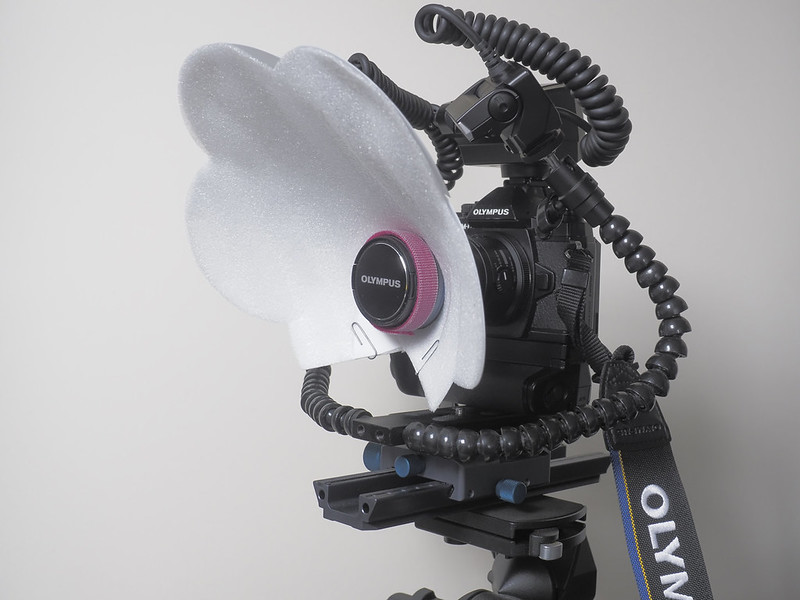
Before conducting the tests I needed to diffuse the flash heads on my Olympus STF-8 Flash. The supplied plastic diffusers that clipped on the flash heads, provided some diffusion and were certainly better than not having any diffuser at all. However, for serious macro use they were inadequate. My solution was to make a diffuser that wrapped around the lens and held together by two paperclips. With clips removed the diffuser could be folded flat and fitted into my back-pack. This diffuser gave lovely soft light that avoided harsh spotlights – a much better solution than the plastic diffusers that came with the STF-8.
Olympus E-M1 on Novaflex Castel Q Focus Rail with Olympus STF-8 Twin Flash and homemade diffuser
Photographing a hard, highly reflective surface, such as a snail’s shell, provided a challenging subject to test my set-up. It’s so easy to have blown highlights on such hard surfaces but as can be seen the homemade diffuser did a great job, providing lovely diffused and evenly distributed light.
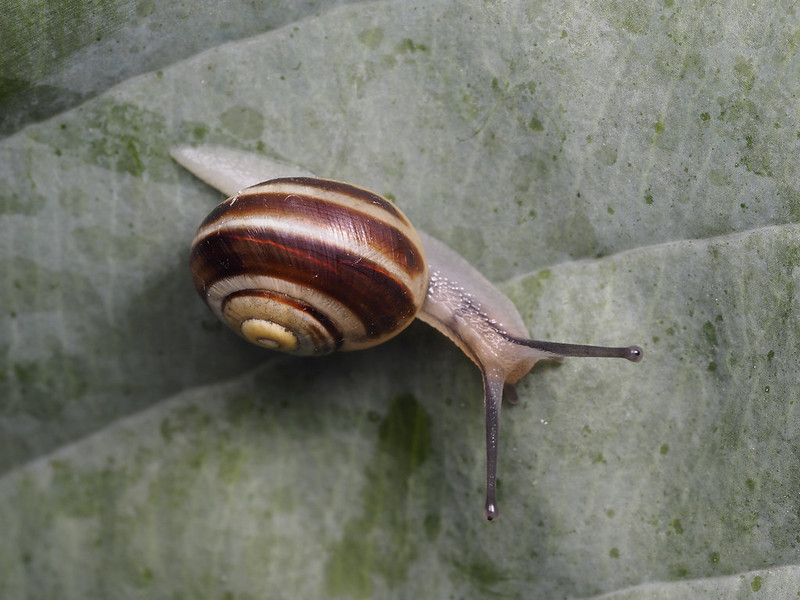
Snail on Hosta plant – the highly reflective shell provided a challenging surface on which to test the diffusion.
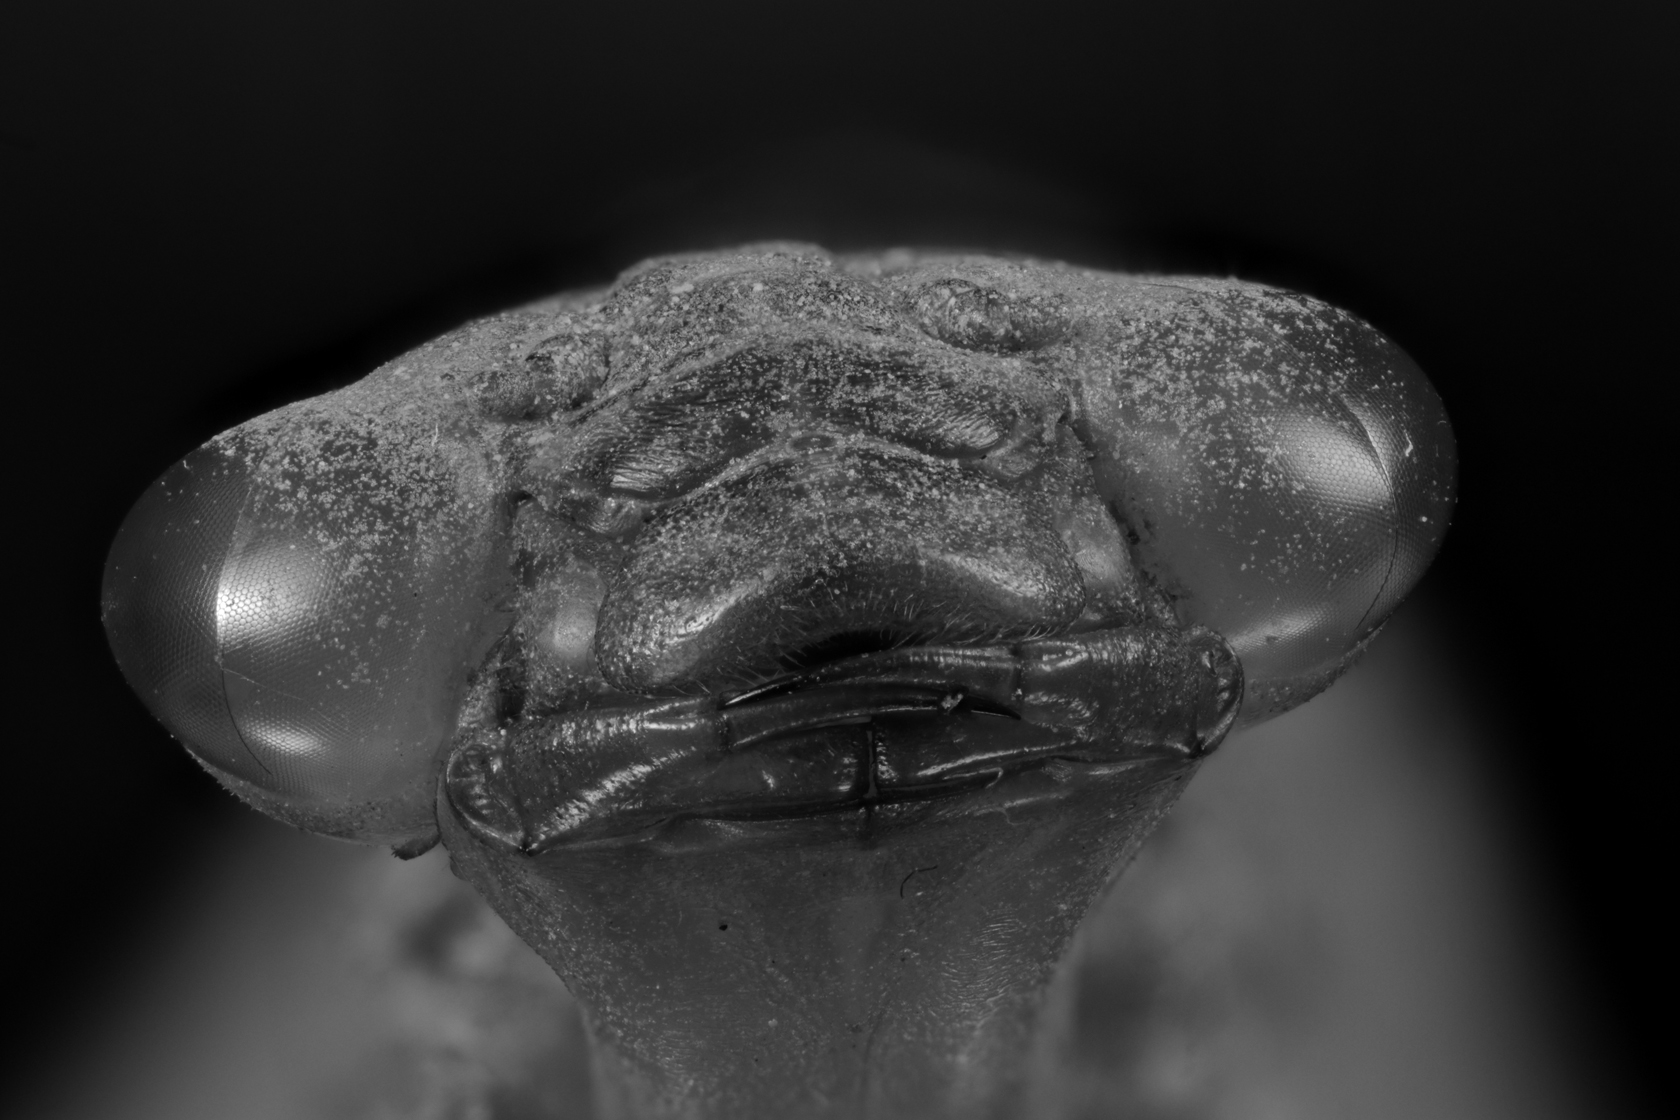
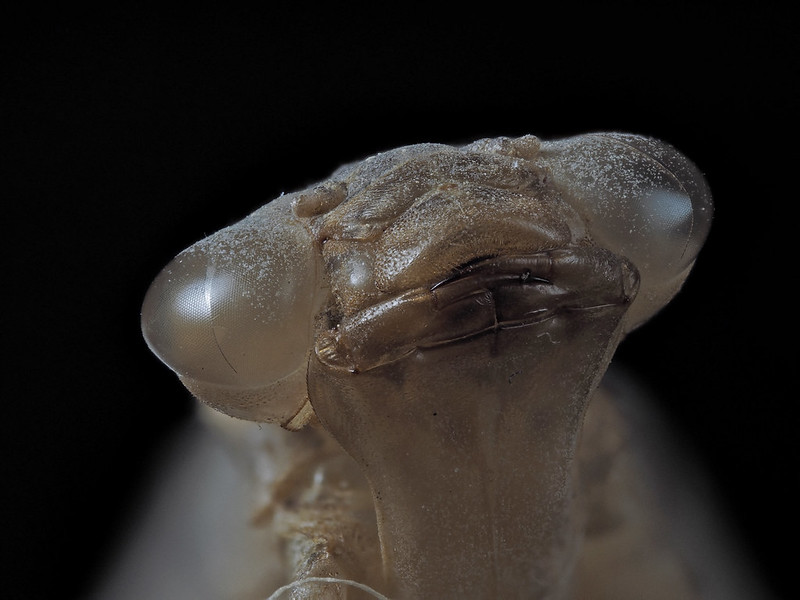
Having sorted out my diffusion I then needed to find a suitable subject for stacking at high magnification. After scratching my head and looking for suitable subjects I turned to my trusted, six years old and fairly well preserved Southern Hawker Dragonfly Exuvia. The exuvia is the exoskeleton of the dragonfly which it lived in for a number of years as a nymph in an aquatic environment. The outer casing is from the recently emerged dragonfly and the exit hole is just behind the head, the white threads are the breathing tubes.
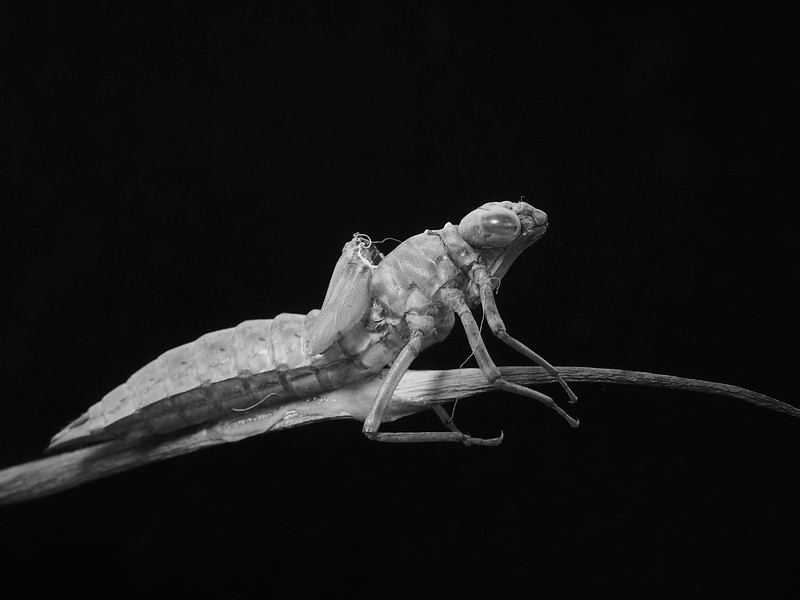
Southern Hawker Dragonfly Exuviae
Olympus E-M1 with Olympus 12-40mm Pro lens on Novaflex Castel Q Focus Rail with Olympus STF-8 Twin Flash and homemade diffuser
I used this full body Exuvia as my starting point. I rather like the dramatic lighting and the way the light falls on the top-half of the exuvia helping to give a more three-dimensional look. I very rarely try black and white conversions but I thought the sculptural quality of the exuvia lent itself well to black and white. For post production I used the Photoshop Chanel Mixer in the adjustments layers and tweaked the red and yellow filters. This increased the contrast in a similar fashion to using a yellow or red filter in traditional film photography.
I’ve photographed dragonfly exuvia many times and each time I’m struck by the fact that up-close they look rather menacing and alien-like. In this context, it comes as no surprise to find that the main influence on H.R. Giger’s concept of the terrifying creature in the film Alien was directly inspired by the dragonfly nymph’s projectile mouthparts! All of which made me think that it should be possible to better emphasise this menacing presence through black and white. The exuvias’ sculptural qualities also leant themselves well to a more dramatic, almost ‘film noir’ treatment as the menacing creature’s head appears emerging from the darkness. The results can be seen below.
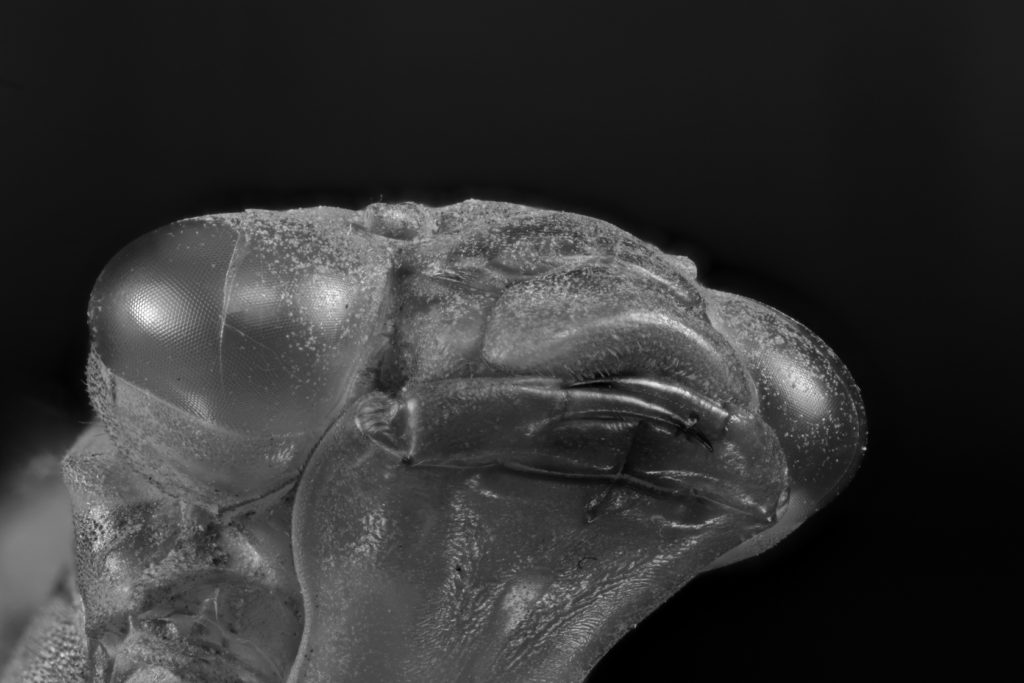
24 stack using PMax setting on Zerene Stacker
OK – lets get down to the crux of the matter and compare stacking comparisons.
WeMacro Focus Rail
The WeMacro Focus Rail is an automated rail that offers the finest degree of control. The lowest increment can be as low as 1 micron. Micron is short for micrometer, one-millionth of a meter. Since the metric system is very rational, there are 1,000 microns in a millimeter and 10,000 microns in a centimeter. Although this degree of control may be needed for magnifications of x10 and above; for insects at 5x – 62 microns is ample. WeMacro provides a very useful ‘DOF Estimates For Macro Chart’. Using this chart I was able to set the depth of field step size based on aperture and magnification. I just looked it up on the DOF Estimate for Macro Chart. For example, on an APS-C sensor using f5.6 at 2x magnification 193 micron step sizes were recommended.
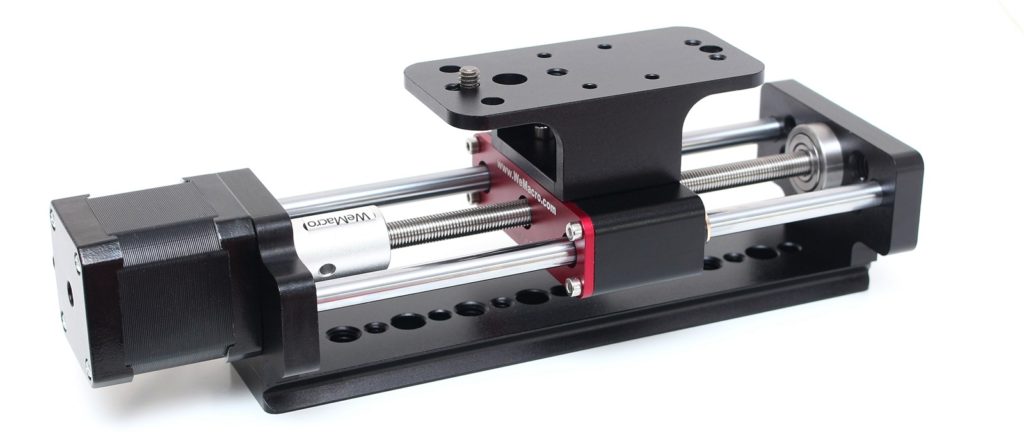
WeMacro’s automatic focus stacking rail has total travel length of 100 mm. It’s minimum step can be set as 1 micron in precise mode.
The rail is fully controlled by a computer, or using Bluetooth on iPhone or iPad.
Equipment used on WeMacro Focus Rail:
Canon MP-E 65mm – Canon 80D – Yonguno YN24EX – f5.6 – 193 micron units – 21 stack
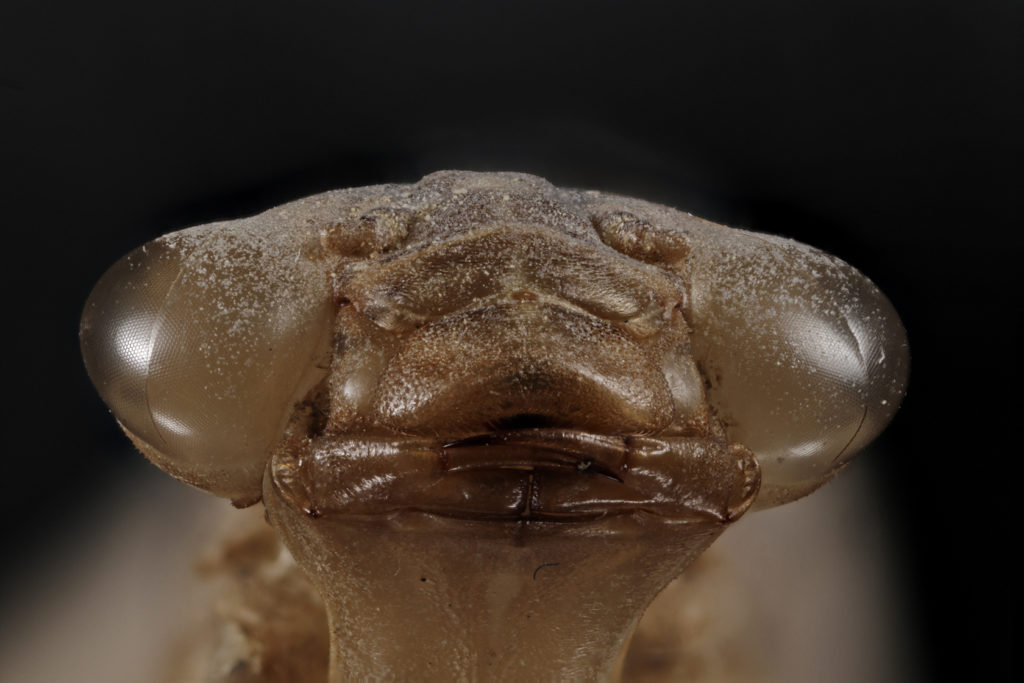
21 stack using PMax setting on Zerene Stacker / f5.6 / flash 64 power
Positives:
– The WeMacro Focus Rail offers the greatest degree of control and maximum magnification – an incredible 1 micron!
Negatives:
– Heavy – great for studio but not to so practical for field stacking
Novaflex Castel Q Focus Rail
There is always the good old fashioned way of manually stacking using a focus rail. Although much slower than using an automated method it does provide the satisfaction of being able to see the focus with each turn of the focus knob. With care and attention manual focus stacking can be suitable for maximum magnifications of 5x.
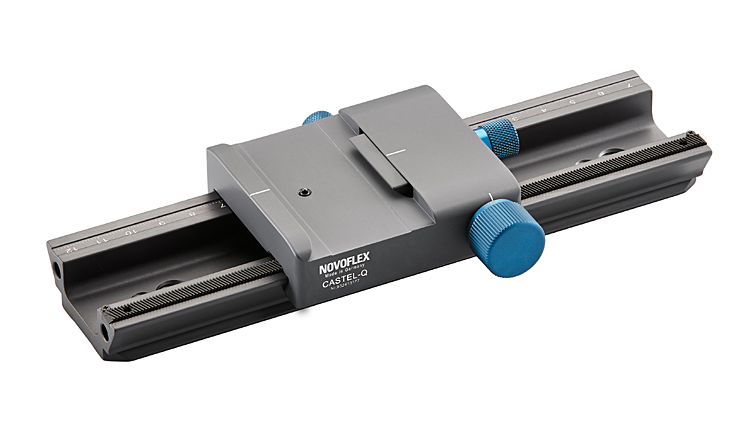
The CASTEL-Q is a precision focusing rack with an ARCA size dovetail clamping mount.
The focusing rack is easily directly mounted to a standard tripod head with an ARCA-style clamp
Max travel distance of the sliding block: 5.5”; Adjustment range with a complete rotation of the drive wheel: 15mm (0.6”)
Equipment used on Novaflex Castel Q Focus Rail:
I used the Olympus Zuiko 60mm Macro lens with Raynox DCR250 on an Olympus E-M1 body and Olympus STF-8 macro twin flash. Equivalent to 3X magnification on full frame sensor.
Using a Novaflex Cast-Fine Fine Focus adjuster I was able to move the camera in one quarter of a mm increments while setting the shutter speed at 1/250 sec (compare this to the substantially slower shutter speed of 1/13 sec necessary for focus stacking when using the in-camera feature on the Olympus EM1). Fortunately, this has increased to 1/60 sec on E-M2.
Manual stack of 16 flash exposures
Exposure settings: 1/250, f5.6, ISO 200 – Stacked in Zerene Stacker.
Positives:
– More control over shutter speed (not stuck with 1/13 sec speed of Olympus in-camera focus stacking.
– Area of focus can be clearly seen on-the-fly and with each turn of the focus knob.
– More control over where to start and finish the focus stacking sequence – can see exactly what is in and out of focus with each forward increment.
– Flash is more stable – sometimes when using camera in-body stacking there is the risk that either the flash will not fire or else the final jpg composit stack will fail to appear.
Negatives:
– Much slower than using the focus stacking feature on Olympus camera – this is acceptable in the studio but not really practical in the field where one needs to finish the focus stacking as quickly as possible or else risk the motion blur caused by a moving subject.
– Much care is needed when turning the fine focus knob to avoid camera movement.
– Much precision is needed when turning the fine focus knob to make sure that all increments are equal and small enough to avoid banding – this is made easier by using the Novaflex Cast-Fine Fine Focus adjuster which attaches to the end of the focus knob and allows for more precise movement.
Olympus E-M1 in Camera Stacking
The focus stacking feature on Olympus E-M1 captures 8 raw images and from these a final jpg composite is generated. The stack is captured within seconds making it a fast and practical way to use stacking in the field.
The E-M1 can also focus bracket up to 99 images which can then be imported for stacking on Zerene Stacker.
Focus stacking is a useful technique found on Olympus E-M series cameras.
With this feature, the stack can be made of up to 8 images on E-M1 and 15 on E-M2 cameras.
Equipment used with Olympus E-M1
I used the Olympus Zuiko 60mm Macro lens with Raynox DCR250 and Olympus STF-8 macro twin flash. Equivalent to 3X magnification on full frame sensor.

Stack of 8 flash exposures using Olympus E-M1 in-camera focus stacking.
Exposure settings: 1/13, f5.6, ISO 200 – 4/1 flash ratio and differential of 8
Positives:
– The lightest and quickest method of all.
– Great for stacking in the field.
– Olympus E-M1 with Olympus Zuiko 60mm lens and STF-8 twin flash weigh just under 1 kilo. Compare this to my Canon 5D and Yonguno YN24EX on Canon Speedlite Bracket SB-E2 weighing in at a whacking 3 and a half kilos!
Negatives:
– The amount of focus increments needs to be approximated from a differential of 1 – 10. One can’t set the focus starting and ending points as with the WeMacro Focus Rail nor see what’s in and out of focus – as with manual stacking.
Conclusion:
For studio stacks I preferred the use of a focus rail. I felt this gave me more control over focus and exposure. For more precise control the WeMacro gave the best performance.
On the other hand, in the field, I’m willing to sacrifice the finer control of using a rail for the ease and practicality of using the excellent Olympus in-camera focus stacking.
CLICK ON IMAGE TO ENLARGE

Leave a Comment