On 15th March, I found this wonderful moth pupa in my garden shed. The case had a reflective waxy-like coating (not too dissimilar to a ladybird elytra) a good subject for which to experiment with stacking, studio flash and diffusion. I used the obligatory tripod and micro-rail with two heavily diffused flashes. The flashes were set to manual as I found this gave me better control. First off, I used the Sigma 150mm and then the Canon MPE 65mm. The pupa was kept in a container with daily doses of my breath to help moisten it while I patiently waited for the moth to emerge.
When they are ready to pupate caterpillars look for a suitable place to complete this part of their life cycle which may be on a plant or tree, under leaf and other litter on the ground or in this case in the garden shed.
The pictures that follow show the areas where significant parts of the adult insect will form. The 3 pairs of legs (the true legs) are attached to the thorax of the adult insect and from the front to the back of the head are named as follows:- The Prothoracic, the Mesothoracic and the Metathoracic legs.
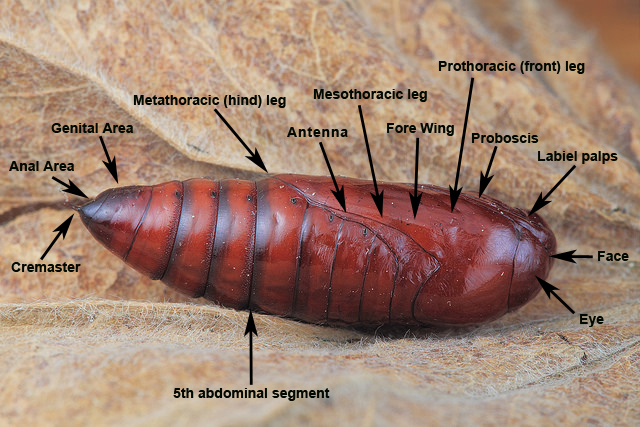
Sigma 150mm macro – 4 shot focus stack using Zerene Stacker
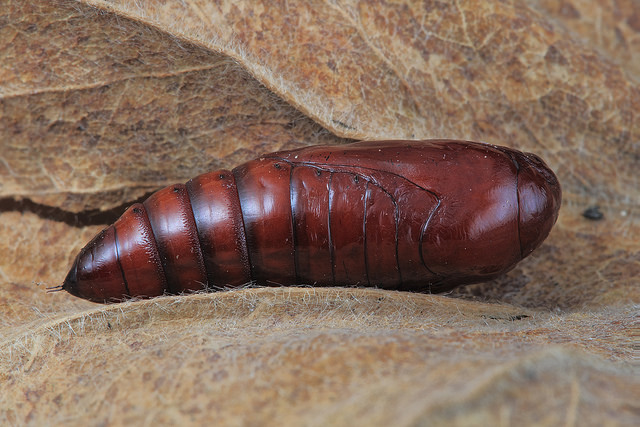
Sigma 150mm macro – 10 shot focus stack using Zerene Stacker
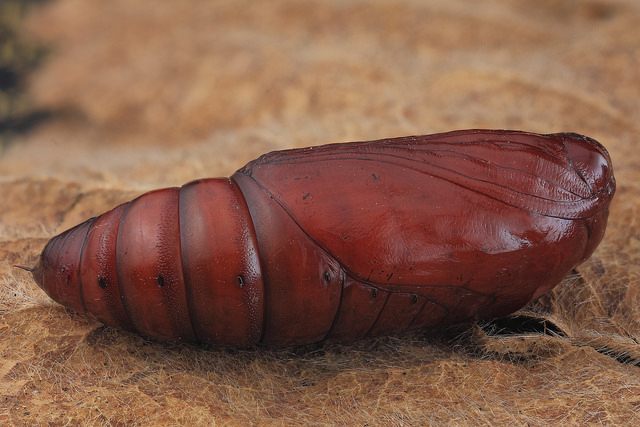
Canon MPE 65mm macro – 2x magnification – 12 shot focus stack using Zerene Stacker
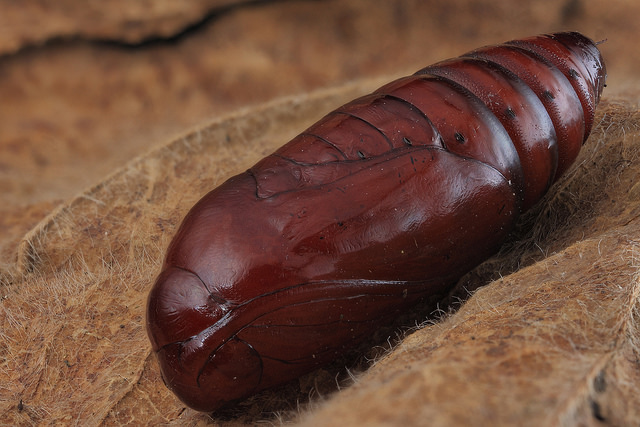
Canon MPE 65mm macro – 2x magnification – 22 shot focus stack using Zerene Stacker
From this foreshortened viewpoint the eyes are at the front with the antenna stretching down to the wing area. Notice the tiny holes running along the abdominal segments. These are the ‘spiracles’, breathing ports that provide both the caterpillar and moth with oxygen.
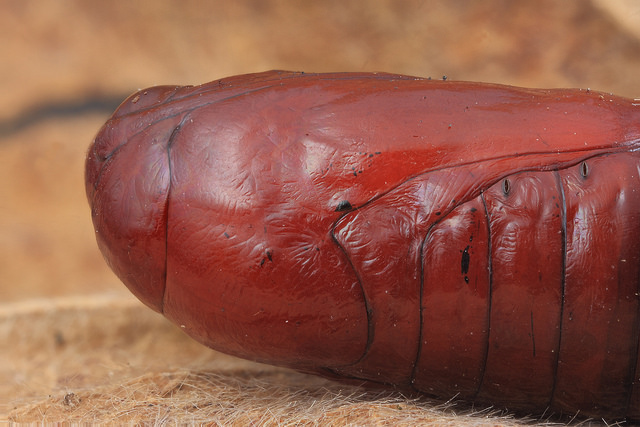
Canon MPE 65mm macro – 2x magnification – 10 shot focus stack using Zerene Stacker
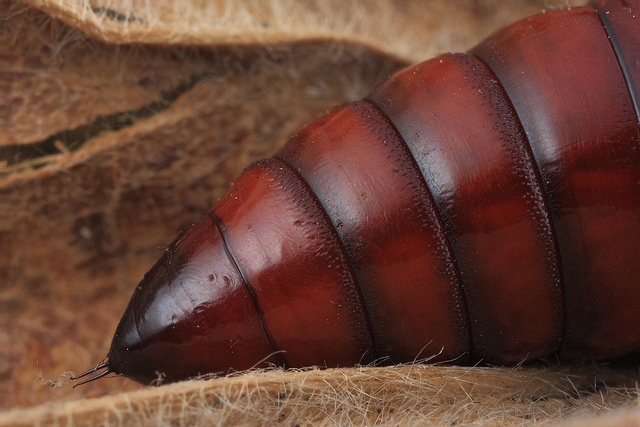
Canon MPE 65mm macro – 2x magnification – 6 shot focus stack using Zerene Stacker
The hook like projection seen at the end of the abdomen is the ‘cremaster’ which is used to attach the hind end of the moth’s pupa to a twig or other structure. The cremaster can be a series of hooks or just a single larger hook.
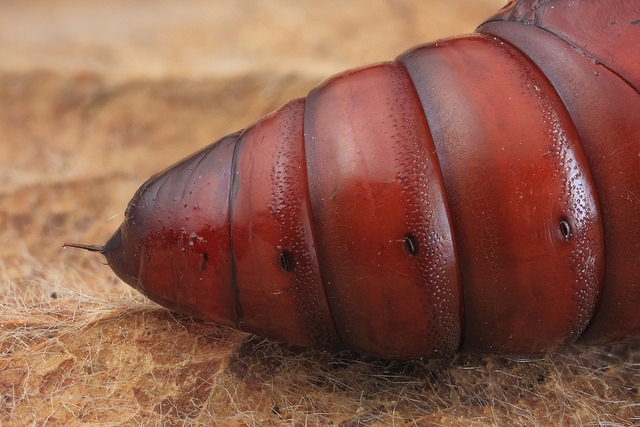
Canon MPE 65mm macro – 2x magnification – 8 shot focus stack using Zerene Stacker
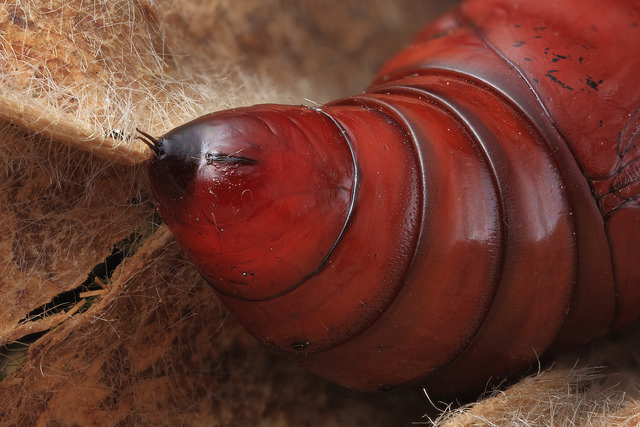
Canon MPE 65mm macro – 2x magnification – 9 shot focus stack using Zerene Stacker
The slit below the cremaster (the hook-like spike at the end of the abdomen) is the anus.
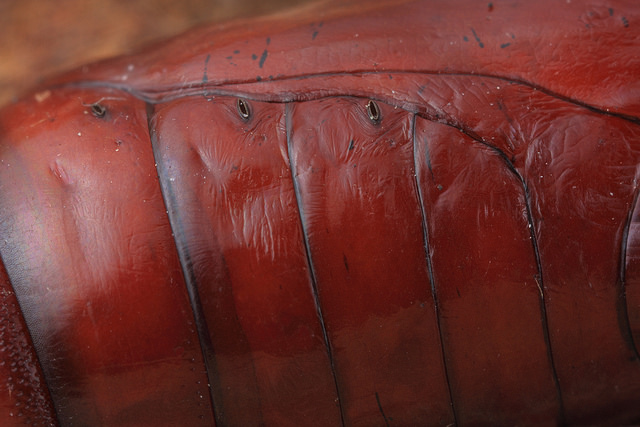
Canon MPE 65mm macro – 3x magnification – 4 shot focus stack using Zerene Stacker
The three little holes seen at the top of each abdominal section are the ‘spiracles’: oval breathing vents used to receive oxygen. You can see them on the sides of the abdominal sections of caterpillars and pupai, all these dots are breathing ports.
It was then a question of waiting patiently to see what species of moth would emerge. That, however, will be the subject of my next post.
What species of moth do you think emerged?
To find out CLICK HERE

Jan
May 10, 2023 2:10 amMany thanks of this informational page.
Alex
September 20, 2023 2:59 pmHi Jennie,
Thank you for your questions and glad you found my article helpful.
What kind of container did you use?
I used a kitchen Tupperware storage container with a lid partially open to let in air. Some say that there is no need to make holes in the lid, for air within will last a small invertebrate creature many hours (if not days). I don’t want to take any chances with the pupae, so I believe it’s important to have some ventilation in the container even if it’s minimal. Moisture from living things can condense on plastic or glass, causing pupae to rot or drown in a sealed container.. We can address this problem by popping a strip of kitchen towel or toilet tissue underneath the pupae. When the moth emerges, it then has something to cling to, which also calms it down, making it easier to observe. Some recommend that you spray the pupae with a mist-sprayer daily, but I think that if you’re not careful, we can easily overdo this, leading to rot. For this reason, I think that the breath from one’s mouth, daily, provides sufficient moisture – not too much and not too little.
Even better than Tupperware, I would suggest you use a cardboard box, such as a shoe box. Cut a hole in the lid, then glue or staple a fine mesh, gauze, or muslin over this. I think this container is better because they made the card from plant/wood fibres, which are organic. It’s always better to mimic the natural processes of nature.
Where did you keep it?
I kept the container in my attic studio, which is well ventilated and has no radiators. The worse thing one can do is to place the pupae near a radiator or in a centrally heated room. The dry air will almost certainly cause the pupae to dry out. So anywhere that is dry, but that has natural ventilation, such as a shed, for example.
Emergence
The sign something is about to happen is when the pupa becomes semi-transparent. Check every few hours, especially first thing in the morning. Once the emergence has occurred, you have successfully raised a moth/butterfly that you can release back into the wild. Release your moth into some nice dense vegetation where it won’t get gobbled up by the first bird that comes along. I prefer to release them in the evening so that they don’t have so long to wait for nightfall. Alternatively, if you have a pair of moths, you might like to see if you can complete the cycle by getting them to mate. Species without mouthparts, such as Poplar Hawkmoth (Loathe populi), are easy as you don’t have to feed them, but most species will need some plant material to lay eggs on. Sex them by antennae shape (often feathery in males), and also abdomen size – females are fat and chunky, males are thinner. The other magic ingredient is a bit of peace and quiet (moths are very sensitive to vibration and disturbance). So place them in a cool dark room and put a ‘do not disturb’ notice on the door. With a bit of luck, your moths will mate within a few days, the female will lay eggs and you can start all over again.
I hope this information is helpful and that it inspires you to have a go at rearing your own pupae. It really is the most wonderful experience and one I’m sure you will never forget.
There are many splendid books and articles on the internet should you wish to research this in more depth.
Be sure to check my blog posts on wildlifemacro.com. My blog combines my passion for wildlife and macro photography. While WildlifeMacro blog primarily covers insects and insect photography, I may occasionally veer into other photography genres and topics related to nature conservation.
Below are some articles that you may find interesting:
Moths Glorious Moths:
https://wildlifemacro.com/index.php/2017/08/30/moths-glorious-moths/
Ladybird Metamorphosis:
https://wildlifemacro.com/index.php/2017/10/30/ladybird-metamorphosis/